
Jira là một trong những công cụ quản lý dự án Agile hàng đầu được các nhóm sử dụng để lập kế hoạch, theo dõi, phát hành và hỗ trợ phần mềm đẳng cấp thế giới một cách tự tin. Nó là nguồn thông tin xác thực duy nhất cho toàn bộ vòng đời phát triển của bạn, trao quyền cho các nhóm tự chủ với bối cảnh để tiến nhanh trong khi vẫn kết nối với mục tiêu kinh doanh lớn hơn. Dù được sử dụng để quản lý các dự án đơn giản hay để thúc đẩy các quy trình DevOps của bạn, Jira Software giúp các nhóm dễ dàng tiến hành công việc, giữ sự thống nhất và giao tiếp trong ngữ cảnh.
Bài hướng dẫn này sẽ chỉ cho bạn cách cài đặt Jira Software (Data Center) v9.0.0 trên server Ubuntu 20.04.
Chuẩn bị
-
Một server chạy Ubuntu 20.04 với tối thiểu 4GB RAM.
-
Server đã được gán địa chỉ IP tĩnh bên ngoài.
-
Port 8080 đã được thêm vào firewall.
Bắt đầu
Đầu tiên, cập nhật bộ đệm gói hệ thống của bạn lên phiên bản mới nhất.
apt-get update -yapt-get upgrade -yKhi tất cả các gói đã được cập nhật, hãy cài đặt các phụ thuộc cần thiết khác.
apt-get install unzip fontconfig -ySau khi hoàn tất, bạn có thể chuyển sang bước tiếp theo.
Cài đặt và cấu hình cơ sở dữ liệu MySQL
Jira sử dụng MySQL/MariaDB làm backend cơ sở dữ liệu. Hướng dẫn này sẽ chỉ cho bạn cách cài đặt MySQL trên server của bạn.
apt-get install mysql-server -ySau khi máy chủ MySQL được cài đặt, bạn có thể xác minh trạng thái của MySQL bằng lệnh sau:
systemctl status mysqlBạn sẽ thấy kết quả như sau:

Tiếp theo, đăng nhập vào MySQL shell:
mysqlSau khi đăng nhập, tạo một cơ sở dữ liệu và người dùng cho Jira:
CREATE DATABASE jira CHARACTER SET utf8mb4 COLLATE utf8mb4_bin;Tiếp theo, tạo người dùng jira với mật khẩu password (bạn có thể nhập thông tin đăng nhập khác, tuy nhiên, hãy chắc chắn rằng bạn nhớ chúng).
CREATE USER 'jira'@'localhost' IDENTIFIED BY 'password';Cấp tất cả các đặc quyền cho cơ sở dữ liệu jira:
GRANT ALL ON jira.* TO 'jira'@'localhost' WITH GRANT OPTION;Cuối cùng, làm mới các đặc quyền và thoát khỏi shell:
FLUSH PRIVILEGES;EXIT;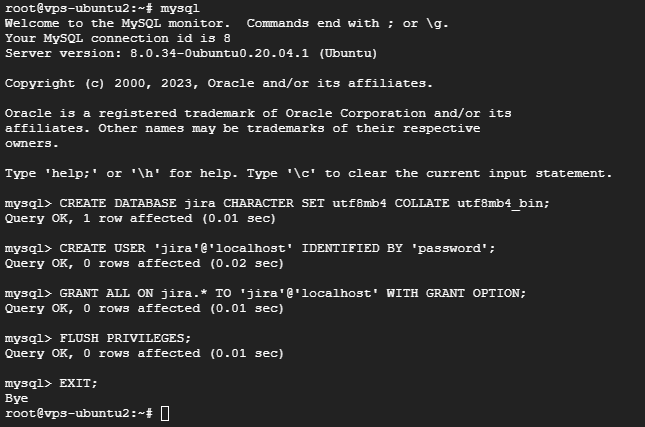
Sau khi hoàn tất, bạn có thể chuyển sang bước tiếp theo.
Cài đặt Jira trên Ubuntu
Đầu tiên, hãy truy cập trang tải xuống chính thức của Jira và tải xuống phiên bản JIRA mong muốn bằng lệnh wget. Trong hướng dẫn này, chúng tôi sẽ cài đặt phiên bản 9.0.0, bạn có thể cài đặt Jira từ tệp lưu trữ TAR.GZ hoặc bằng Linux Installer.
Cài đặt từ tệp lưu trữ (archive file)
Tải tệp từ nguồn sau đó giải nén nó.
wget https://product-downloads.atlassian.com/software/jira/downloads/atlassian-jira-software-9.0.0.tar.gztar xf atlassian-jira-software-9.0.0.tar.gzTạo thư mục để cài đặt.
mkdir /opt/atlassianDi chuyển thư mục đã giải nén và đổi tên.
mv atlassian-jira-software-9.0.0-standalone /opt/atlassian/jiraJira yêu cầu JDK/JRE, để kiểm tra xem JDK đã được cài đặt chưa: Mở một console shell và gõ echo $JAVA_HOME và nhấn Enter:
- Nếu nó trả về một cái gì đó như
/opt/JDK8hoặc/usr/lib/jvm/java-8thì JDK của bạn đã được cài đặt và cấu hình - Nếu không có gì hiển thị, bạn sẽ cần phải cài đặt JDK hoặc đặt biến môi trường
$JAVA_HOME
Cài đặt bằng lệnh (chúng ta sẽ sử dụng JDK 8).
apt install openjdk-8-jreKiểm tra phiên bản java.
java -versionĐặt JAVA_Home.
export JAVA_HOME="/usr/lib/jvm/java-8-openjdk-arm64" # for ARM CPUCập nhật Jira home.
nano /opt/atlassian/jira/atlassian-jira/WEB-INF/classes/jira-application.propertiesSau đó nhập:
jira.home = /usr/local/jiraNhập lệnh sau tại một dấu nhắc shell/console trước khi chạy Jira.
export JIRA_HOME=usr/local/jiraBây giờ bạn có thể chạy Jira từ thư mục BIN.
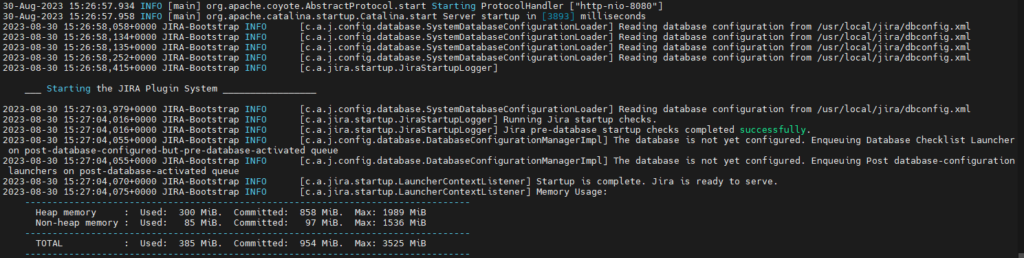
/opt/atlassian/jira/bin# ./start-jira.shChạy thành công:
Nếu bạn muốn dừng Jira, hãy sử dụng lệnh sau.
/opt/atlassian/jira/bin# ./stop-jira.shCài đặt bằng Linux Installer
Bạn không cần cài đặt Java nếu sử dụng Linux Installer vì Eclipse Adoptium JRE được đóng gói sẵn với Jira.
Tải trình cài đặt từ nguồn.
wget https://www.atlassian.com/software/jira/downloads/binary/atlassian-jira-software-9.0.0-x64.binSau khi tải xuống hoàn tất, hãy thay đổi quyền của tệp đã tải xuống.
chmod a+x atlassian-jira-software-9.0.0-x64.binTiếp theo, cài đặt Jira Software bằng cách chạy tệp nhị phân đã tải xuống.
./atlassian-jira-software-9.0.0-x64.binBạn sẽ thấy kết quả như sau:

Nhấn Enter để tiếp tục.

Nhập 2 và nhấn Enter để cài đặt tùy chỉnh (custom install).

Nhấn Enter để chọn đường dẫn cài đặt Jira.

Tiếp theo, nhấn Enter để tiếp tục.

Nhập 1 để sử dụng các cổng mặc định (HTTP: 8080, Control: 8005) và nhấn Enter.

Nhấn Enter để cài đặt Jira as Service.

Tiếp theo, nhấn Enter để bắt đầu cài đặt.

Nhấn Enter để khởi động Jira Software.
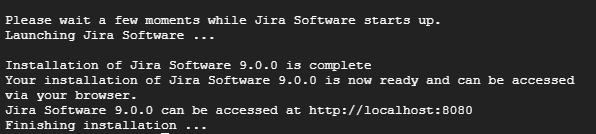
Bây giờ, Jira đã được cài đặt và đang lắng nghe trên cổng 8080. Bạn có thể kiểm tra nó bằng lệnh sau:
ss -antpl | grep javaKết quả:

Cấu hình Jira
Tiếp theo, bạn sẽ cần tải xuống trình điều khiển MySQL JDBC và sao chép nó vào thư mục cài đặt Jira. Trong hướng dẫn này, chúng tôi sẽ sử dụng phiên bản 8.1.0.
wget https://dev.mysql.com/get/Downloads/Connector-J/mysql-connector-j-8.1.0.zipGiải nén tệp đã tải xuống.
unzip mysql-connector-j-8.1.0.zipSao chép trình kết nối MySQL vào thư mục lib của Jira.
cp mysql-connector-j-8.1.0/mysql-connector-j-8.1.0.jar /opt/atlassian/jira/libCuối cùng, dừng và khởi động lại dịch vụ Jira để áp dụng các thay đổi.
/etc/init.d/jira stop/etc/init.d/jira start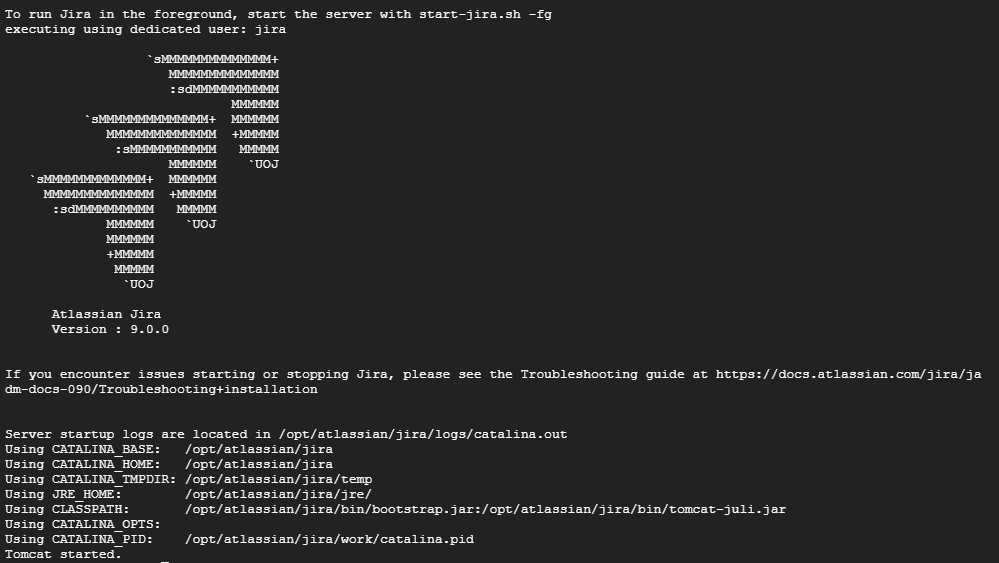
Truy cập giao diện Web của Jira
Bây giờ, hãy mở trình duyệt web của bạn và truy cập giao diện web của Jira bằng URL:
http://[your server's IP]:8080Bạn sẽ được chuyển hướng đến màn hình sau:
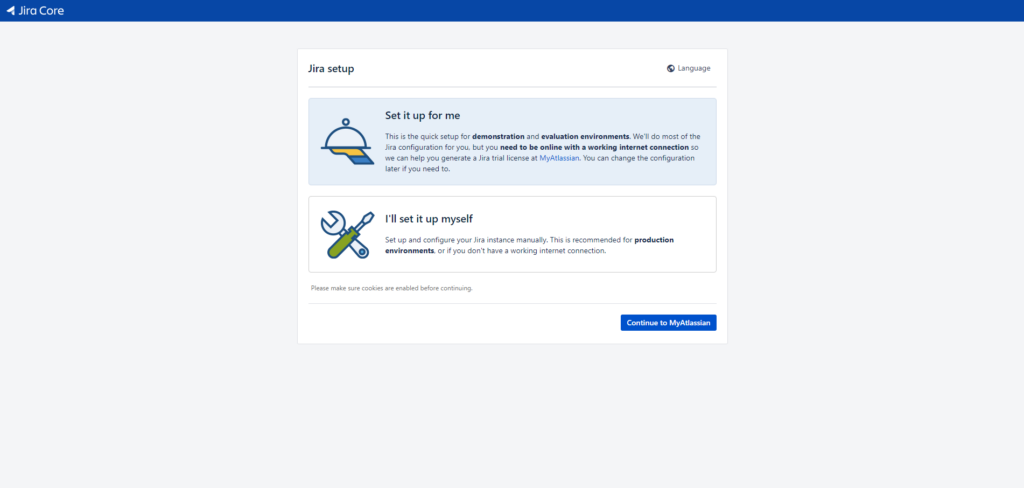
Chọn I’ll set it up myself và nhấp vào nút Next.
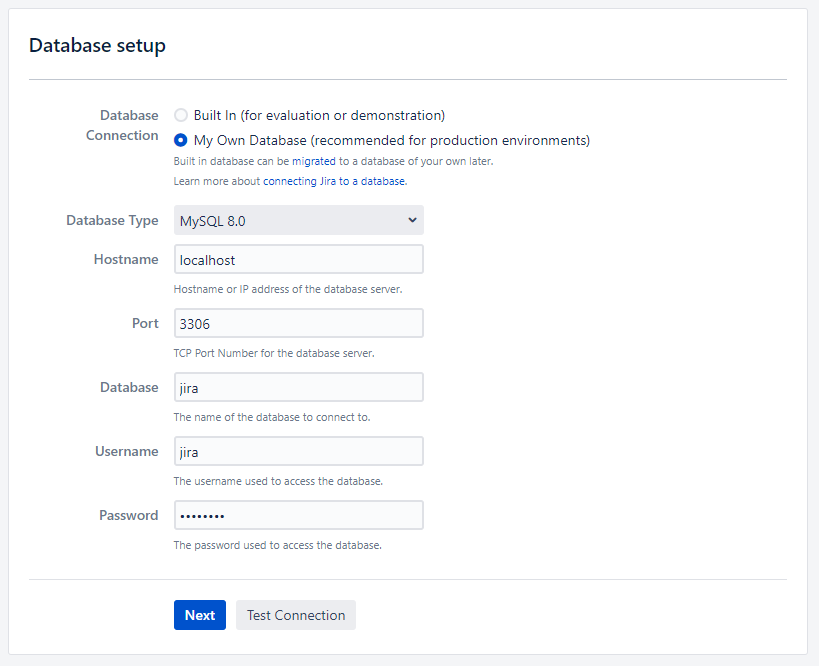
Chọn “My Own Database“, cung cấp chi tiết cơ sở dữ liệu của bạn như trên và nhấp vào nút Next.
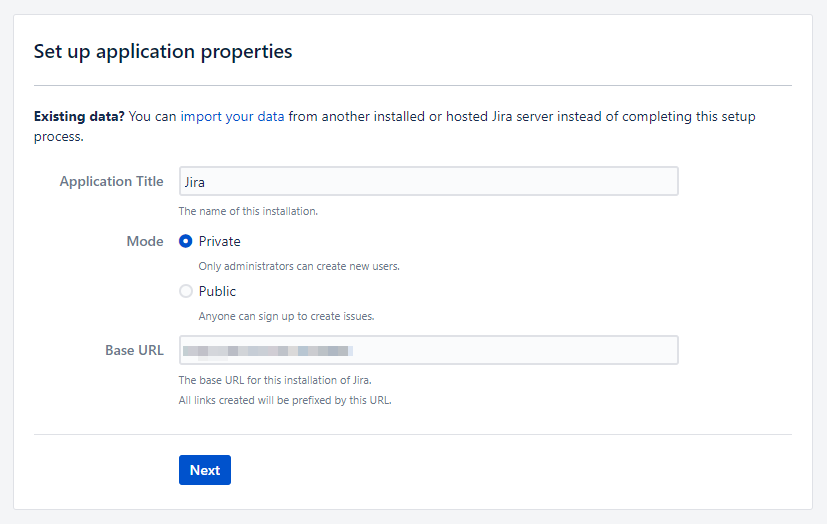
Cung cấp Application Title, Mode, Base URL như mong muốn và nhấp vào nút Next.
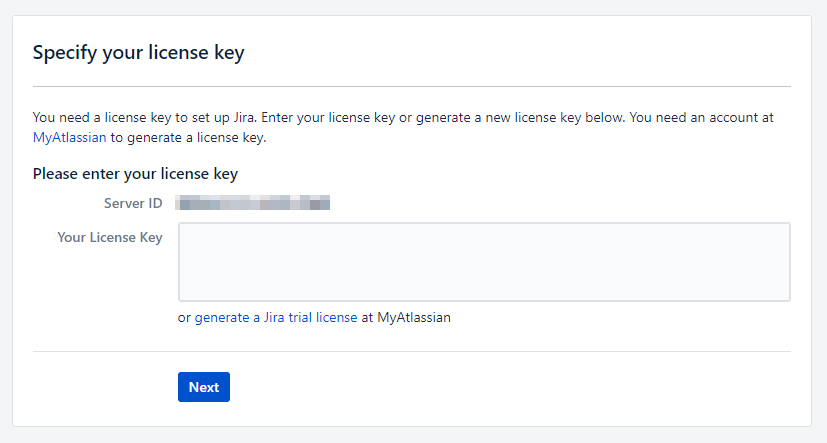
Cung cấp license key và nhấp vào nút Next.
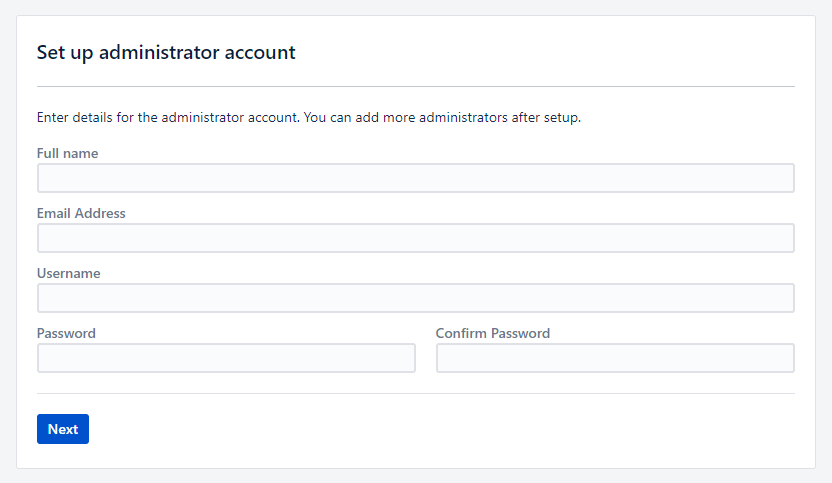
Cung cấp chi tiết tài khoản quản trị của bạn và nhấp vào nút Next.
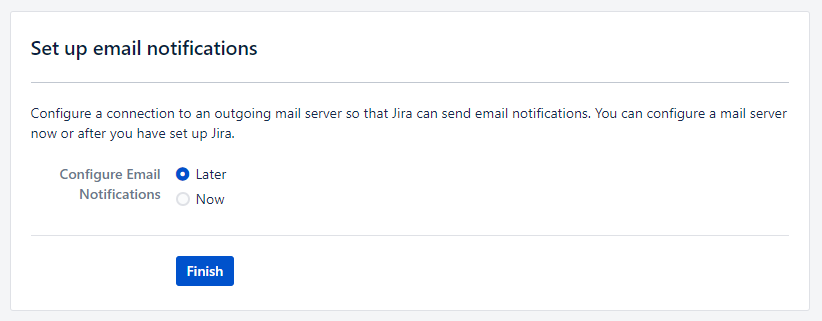
Nhấp vào nút Finish để hoàn tất cài đặt. Trong màn hình chọn ngôn ngữ, chọn ngôn ngữ bạn muốn và nhấp vào nút Continue.
Trong màn hình tiếp theo, chọn avatar của bạn như mong muốn và nhấp vào nút Next.
Chào mừng đến với Jira Software!
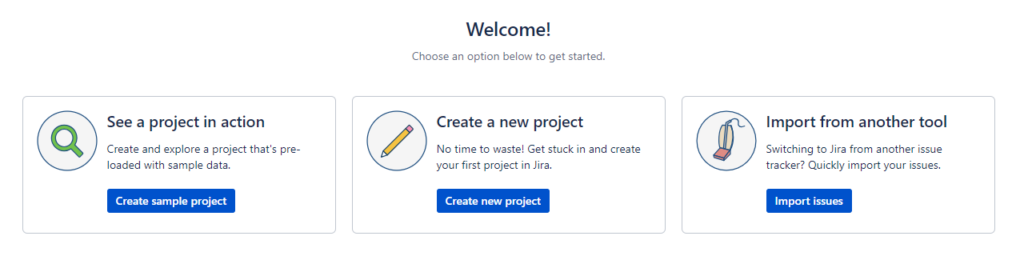
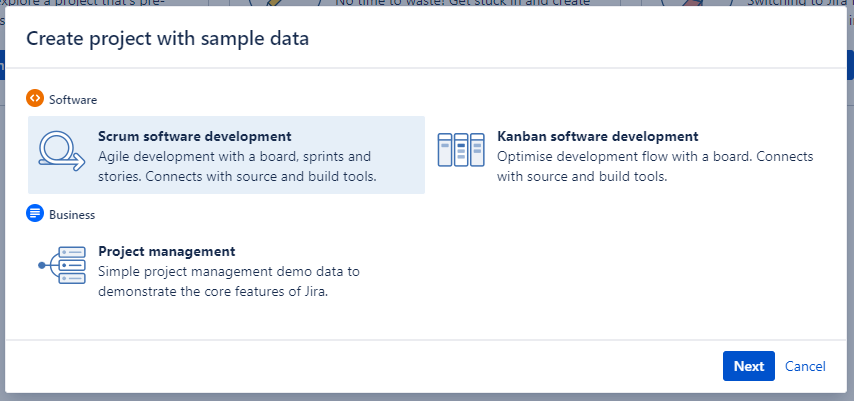
Nếu bạn muốn tạo một dự án mẫu với dữ liệu mẫu, hãy nhấp vào See a project in action.
Hoặc nhấp vào Create a new project để tạo dự án đầu tiên của bạn từ đầu.
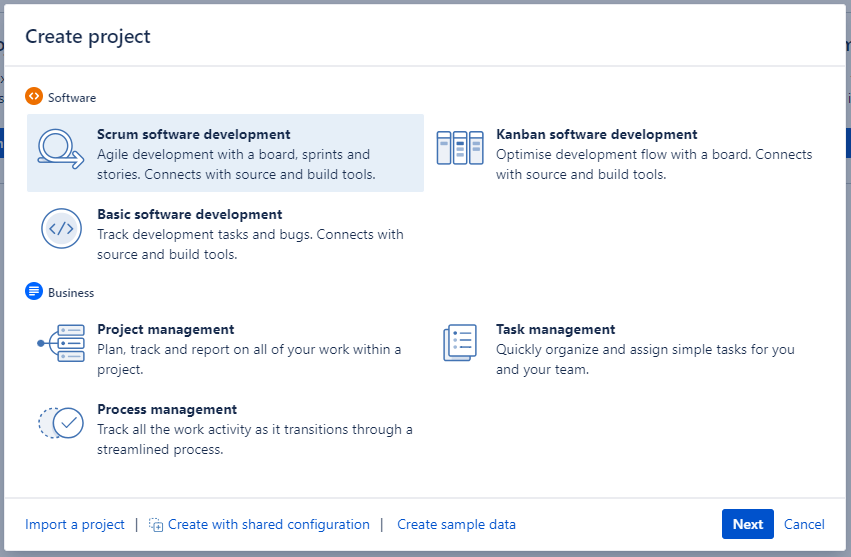
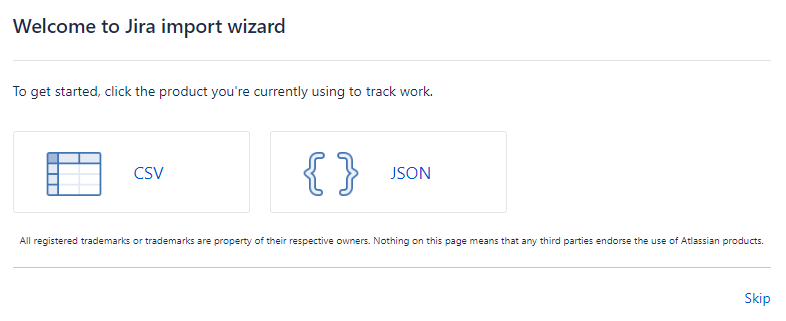
Hoặc nhập các issue với Import from another tool.
Bây giờ bạn đã sẵn sàng quản lý các dự án với Jira Software.
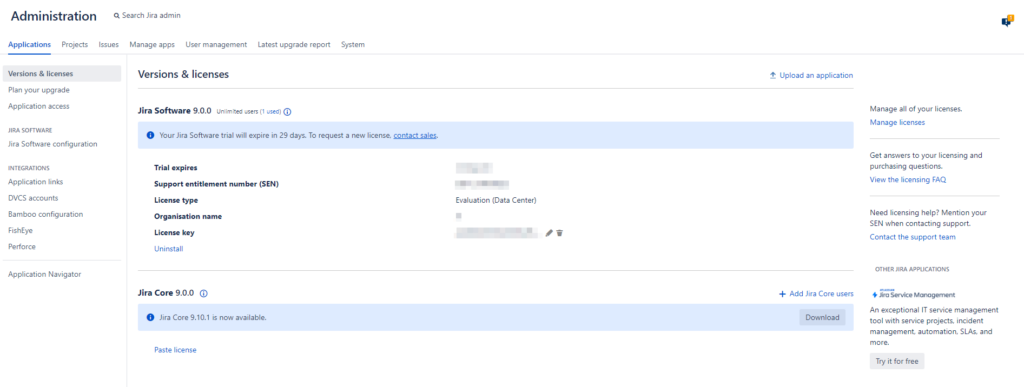
Để kiểm tra phiên bản Jira đã cài đặt, từ góc trên bên phải, nhấp vào biểu tượng bánh răng, chọn Applications.
Kết luận
Xin chúc mừng! Bạn đã cài đặt thành công Jira Software trên server của mình! Bây giờ bạn đã sẵn sàng để bắt đầu quản lý các dự án và công việc hiệu quả hơn.
Tham khảo
[1] https://www.howtoforge.com/how-to-install-jira-agile-project-management-tool-on-ubuntu-22-04/