Khi chúng ta tạo một VM Instance mới trên Oracle Cloud, một địa chỉ Public IP sẽ tự động được gán cho VM Instance của chúng ta và được đặt làm địa chỉ IP Ephemeral theo mặc định. Và, địa chỉ IP này sẽ thay đổi mỗi khi máy ảo của chúng ta dừng hoặc khởi động lại, đó là lý do tại sao chúng ta cần RESERVE một địa chỉ IP Static thay cho địa chỉ IP Ephemeral mặc định để bảo vệ trang web của chúng ta khỏi các sự cố.
Trong bài hướng dẫn này, chúng tôi sẽ trình bày cách reserve một địa chỉ public tĩnh cho máy ảo (VM) của bạn trên OCI.
Bước 1 – Reserved Public IPs
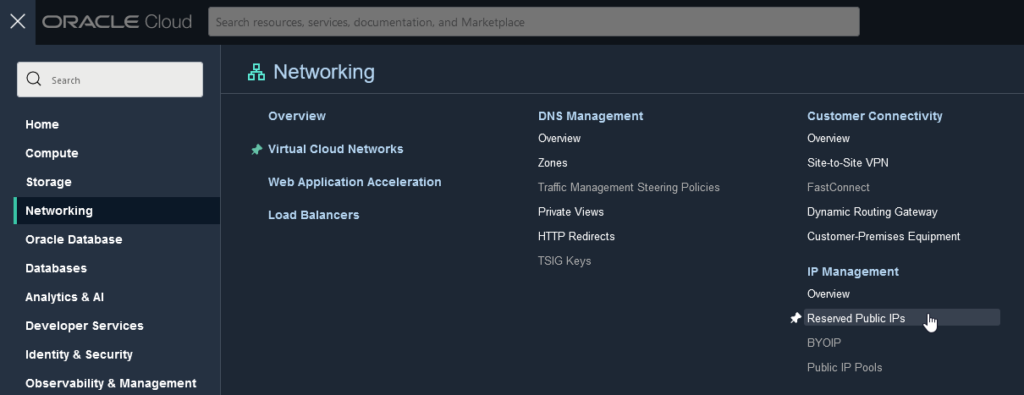
Từ menu Networking, trong mục IP Management, chọn Reserved Public IPs

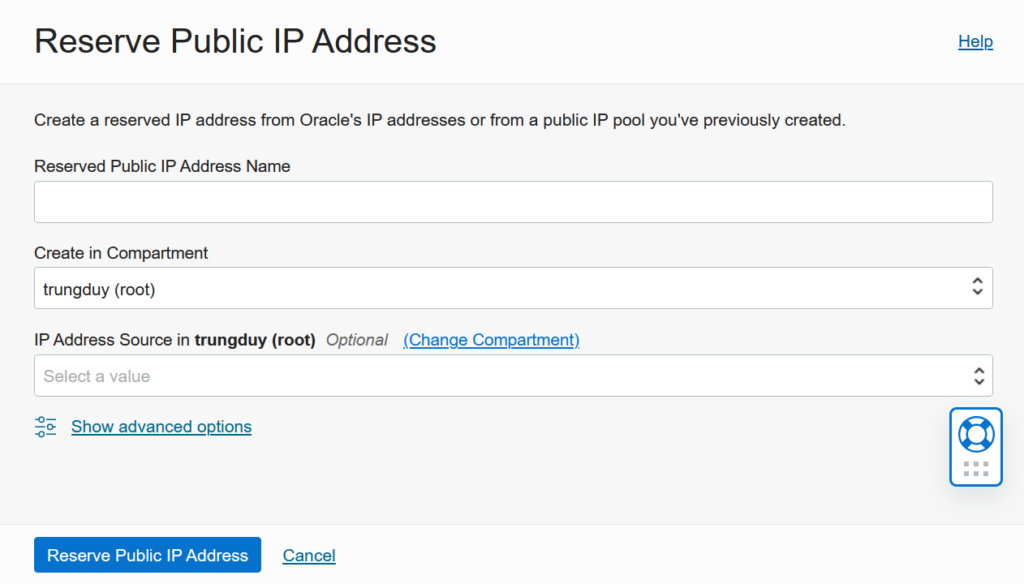
Nhấp vào nút Reserve Public IP Address. Trong biểu mẫu bên phải, nhập tên vào trường Reserved Public IP Address Name, chọn IP Address Source, và sau đó nhấp vào nút Reserve Public IP Address bên dưới biểu mẫu.

Bước 2 – Chọn Reserved Public IP Address
Từ menu Compute, nhấp vào Instances, sau đó chọn VM Instance bạn muốn.
Cuộn xuống mục Resources, chọn Attached VNICs, sau đó nhấp vào tên instance của bạn dưới cột Name.

Trong trang VNIC Details, cuộn xuống mục Resources, chọn IPv4 Addresses. Trong mục IPv4 Addresses, nhấp vào biểu tượng 3 dấu chấm để mở menu, chọn Edit.

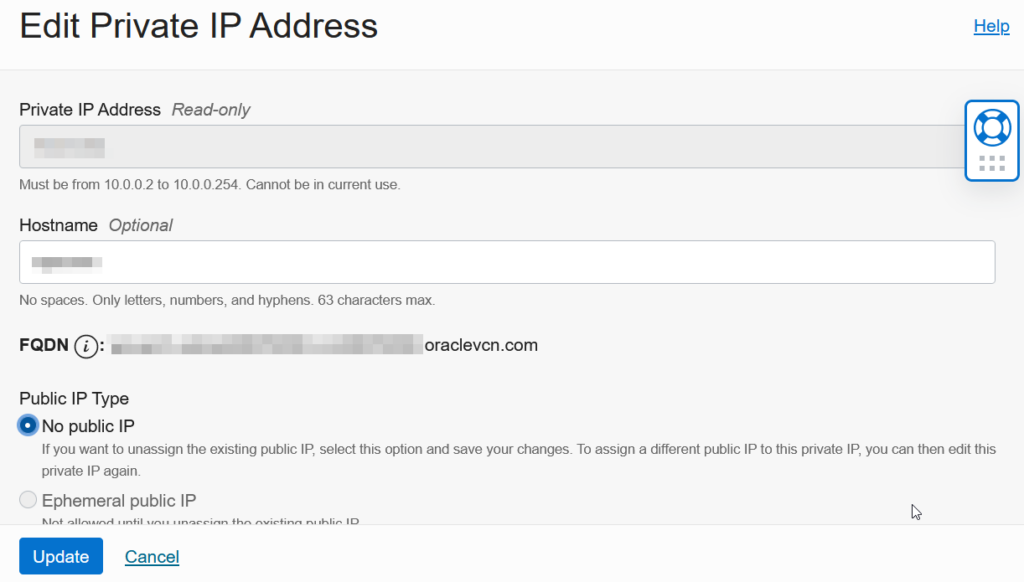
Trong biểu mẫu Edit Private IP Address, chọn No public IP sau đó nhấp vào Update ở bên dưới.

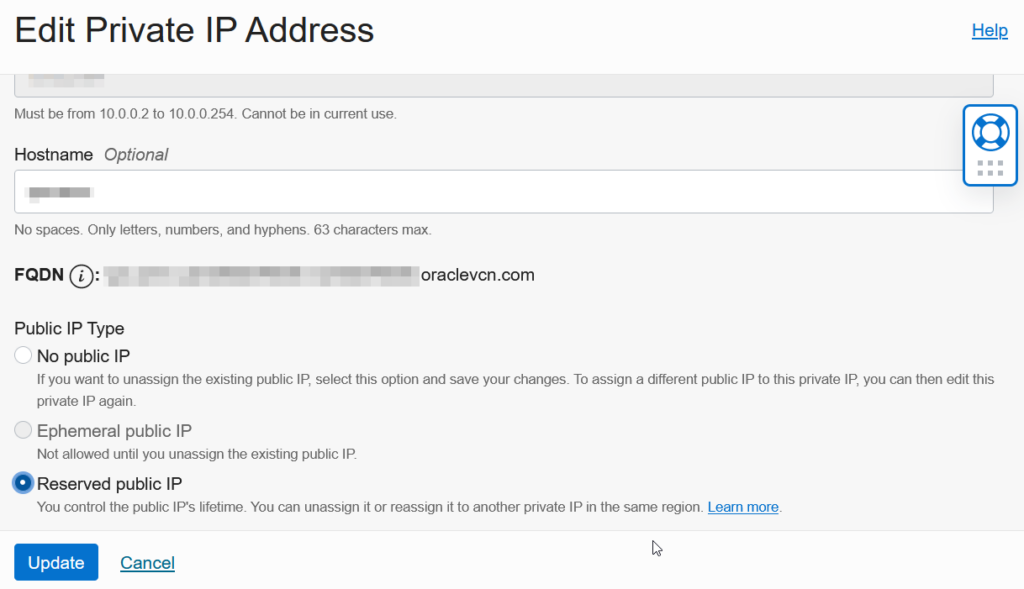
Lặp lại bước trên, nhưng lần này chọn Reserved public IP, nhấp vào địa chỉ public IP bạn đã tạo ở bước đầu tiên, sau đó nhấp vào Update.

Bây giờ, trong mục IPv4 Addresses, bạn có thể thấy VM của mình đã được gán một địa chỉ Public IP tĩnh. Thế là xong!


