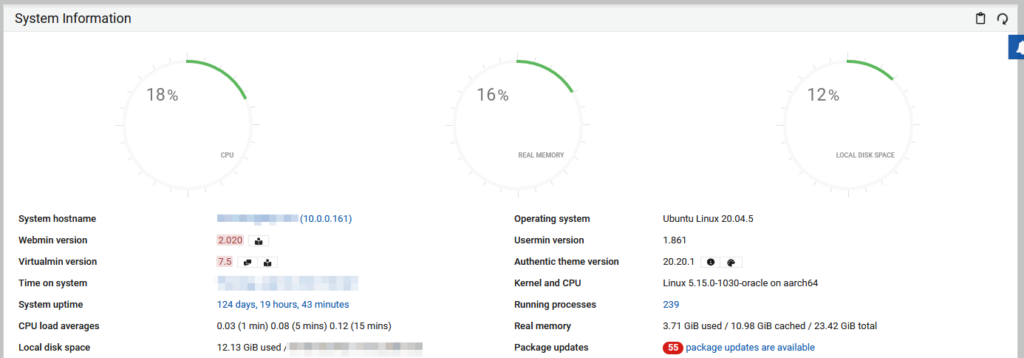
Webmin là một công cụ dựa trên nền tảng web mà các quản trị viên sử dụng để quản lý các hệ thống và server Linux và Unix. Dashboard của Webmin cho phép bạn quản lý tài khoản người dùng (user accounts), cập nhật và cấu hình hệ thống, xem system logs và email, cũng như thực hiện các tác vụ quản trị khác.
Trong bài hướng dẫn này, chúng tôi sẽ nêu từng bước để cài đặt, cấu hình và đăng nhập vào Webmin trên Ubuntu 20.04.
Chuẩn bị
- Một hệ thống đang chạy Ubuntu 20.04.
- Một chương trình terminal hỗ trợ SSH, chẳng hạn như PuTTY, MobaXterm…
Cài đặt Webmin trên Ubuntu 20.04
Làm theo các bước được nêu dưới đây để cài đặt Webmin trên Ubuntu. Các bước này hoạt động cho cả Ubuntu 18.04 và Ubuntu 20.04.
Bước 1: Cập nhật Package List của Ubuntu
1. Trong terminal, chạy lệnh sau để cập nhật danh sách gói:
sudo apt update2. Khi được nhắc, nhập mật khẩu quản trị viên của bạn và nhấn Enter.
3. Cài đặt các gói cập nhật với lệnh:
sudo apt upgrade4. Nhập Y (chữ hoa, không phải y thường) và nhấn Enter để xác nhận việc cập nhật.
5. Cài đặt các gói phụ thuộc (dependency packages) để giúp bạn quản lý các kho phần mềm (software repositories) bằng cách sử dụng:
sudo apt install software-properties-common apt-transport-https6. Nhập Y và nhấn Enter khi được nhắc để xác nhận việc cài đặt.
Bước 2: Kích hoạt Repository của Webmin
1. Thêm khóa GPG của Webmin bằng lệnh:
sudo wget -q http://www.webmin.com/jcameron-key.asc -O- | sudo apt-key add -2. Thêm repository của Webmin một cách thủ công bằng cách sử dụng:
sudo add-apt-repository "deb [arch=amd64] http://download.webmin.com/download/repository sarge contrib"Bước 3: Cài đặt Webmin trên Ubuntu
1. Bắt đầu cài đặt Webmin bằng cách sử dụng:
sudo apt install webmin2. Khi được nhắc, nhập Y và nhấn Enter để xác nhận việc cài đặt.
3. Khi cài đặt hoàn tất, hãy kiểm tra trạng thái của dịch vụ Webmin:
sudo systemctl status webminMột phương pháp khác để xác nhận việc cài đặt thành công là kiểm tra phiên bản đã cài đặt của Webmin:
dpkg -l | grep webminBước 4: Cấu hình Firewall
1. Webmin sử dụng cổng TCP 10000 theo mặc định. Mở cổng này trên firewall của bạn bằng cách sử dụng:
sudo ufw allow 10000/tcp2. Tải lại firewall của bạn để các thay đổi có hiệu lực:
sudo ufw reloadLưu ý: Firewall bị tắt theo mặc định trên Ubuntu. Nếu firewall của hệ thống bạn đang tắt, hãy bật nó lên bằng lệnh:
sudo ufw enable3. Kiểm tra trạng thái firewall của bạn để xác nhận các thay đổi:
sudo ufw statusBước 5: Truy cập Webmin trên Ubuntu
1. Đặt mật khẩu cho người dùng root của Webmin bằng lệnh:
sudo /usr/share/webmin/changepass.pl /etc/webmin root [new password]Lưu ý: Việc thiết lập mật khẩu mới theo cách này chỉ hoạt động đối với người dùng hiện có. Bạn không thể sử dụng phương pháp này để thiết lập người dùng mới.
2. Mở trình duyệt Internet của bạn và nhập địa chỉ web sau đây bằng IP của server:
https://[your server's IP]:10000/Bạn có thể sử dụng địa chỉ IP của server cục bộ hoặc từ xa.
3. Webmin tự tạo ra một chứng chỉ SSL không được trình duyệt nhận dạng, điều này gây ra một trang chỉ báo rủi ro bảo mật tiềm ẩn trong lần đầu tiên bạn cố gắng đăng nhập.

Để vượt qua trang này, hãy nhấp vào Advanced…, sau đó là Accept the Risk and Continue.

4. Đăng nhập bằng tên người dùng mặc định root và mật khẩu bạn đã thiết lập.

5. Sử dụng dashboard của Webmin để xem lại thông tin hệ thống của bạn.

Kết luận
Bây giờ bạn đã biết cách cài đặt Webmin trên Ubuntu 20.04. Sau khi làm theo hướng dẫn này, bạn sẽ có một bản Webmin hoạt động đầy đủ, được thiết lập và sẵn sàng để sử dụng.
Tham khảo
- https://phoenixnap.com/kb/install-webmin-on-ubuntu


